The HighLevel Home Service Business Management Software
Manage dispatch, route plan, techs, quotes, invoices, and more in GHL, the only dedicated field service app for HighLevel home service businesses and contractors.
No image available
Learn how to enable Timesheets for individual Members or your entire team in FieldTask.
FieldTask gives you multiple ways to enable Timesheet access for your Members. You can enable it for individual Members from the Members page or manage it for multiple Members through Settings.
To enable Timesheets for an individual Member:
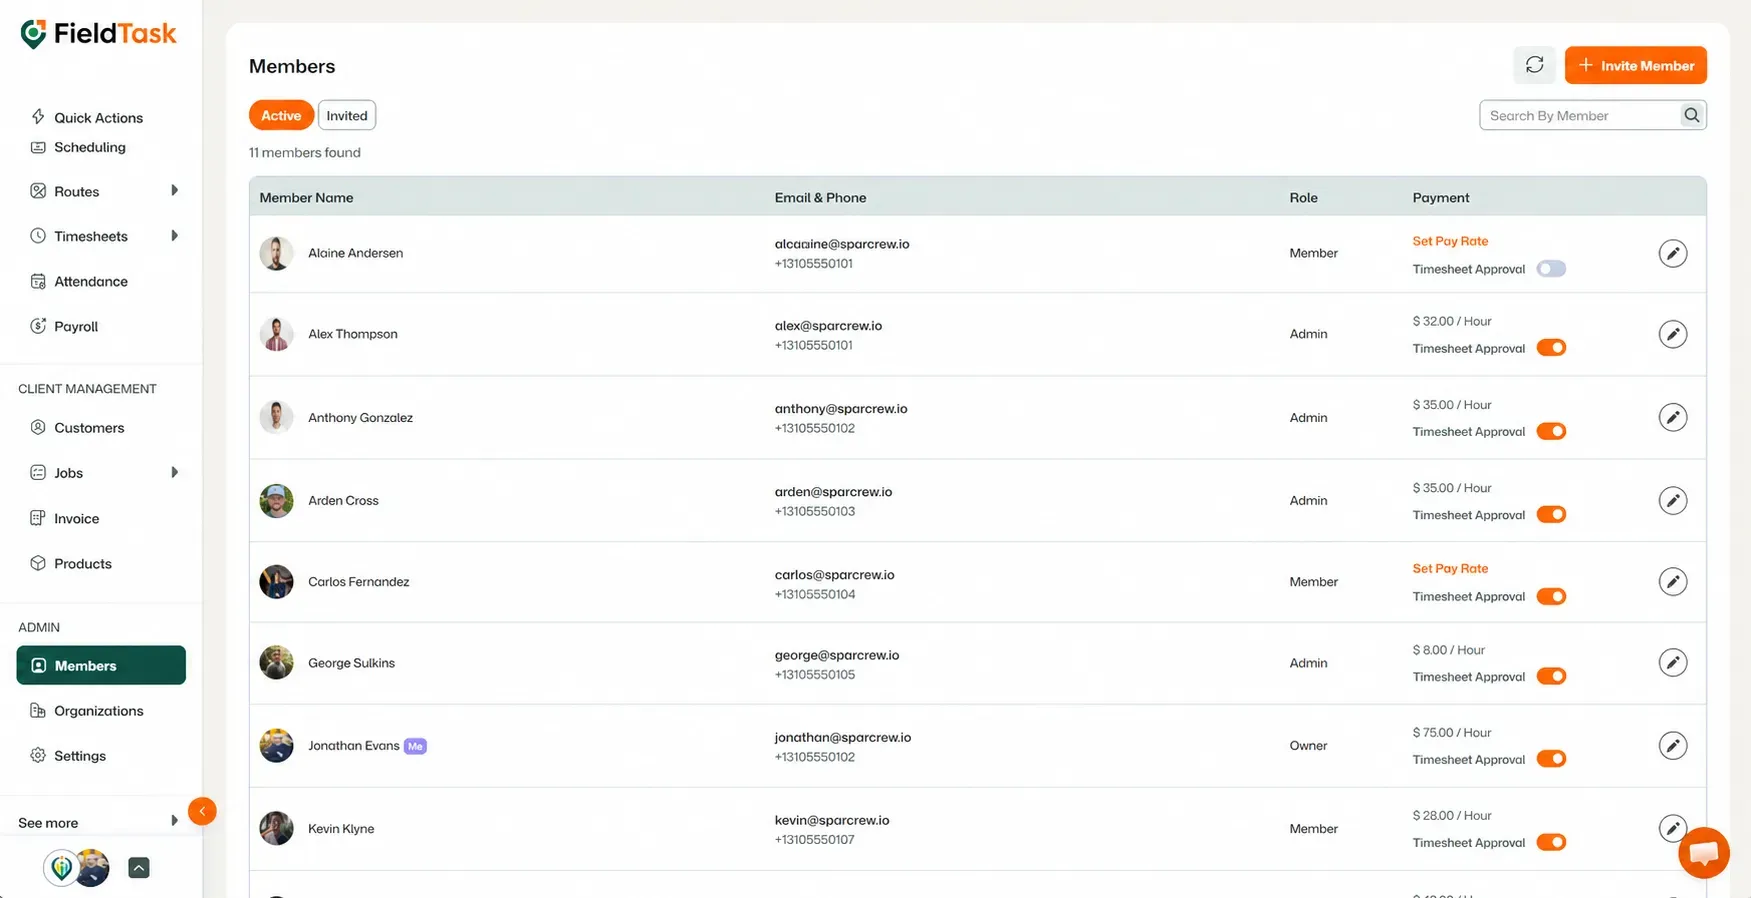
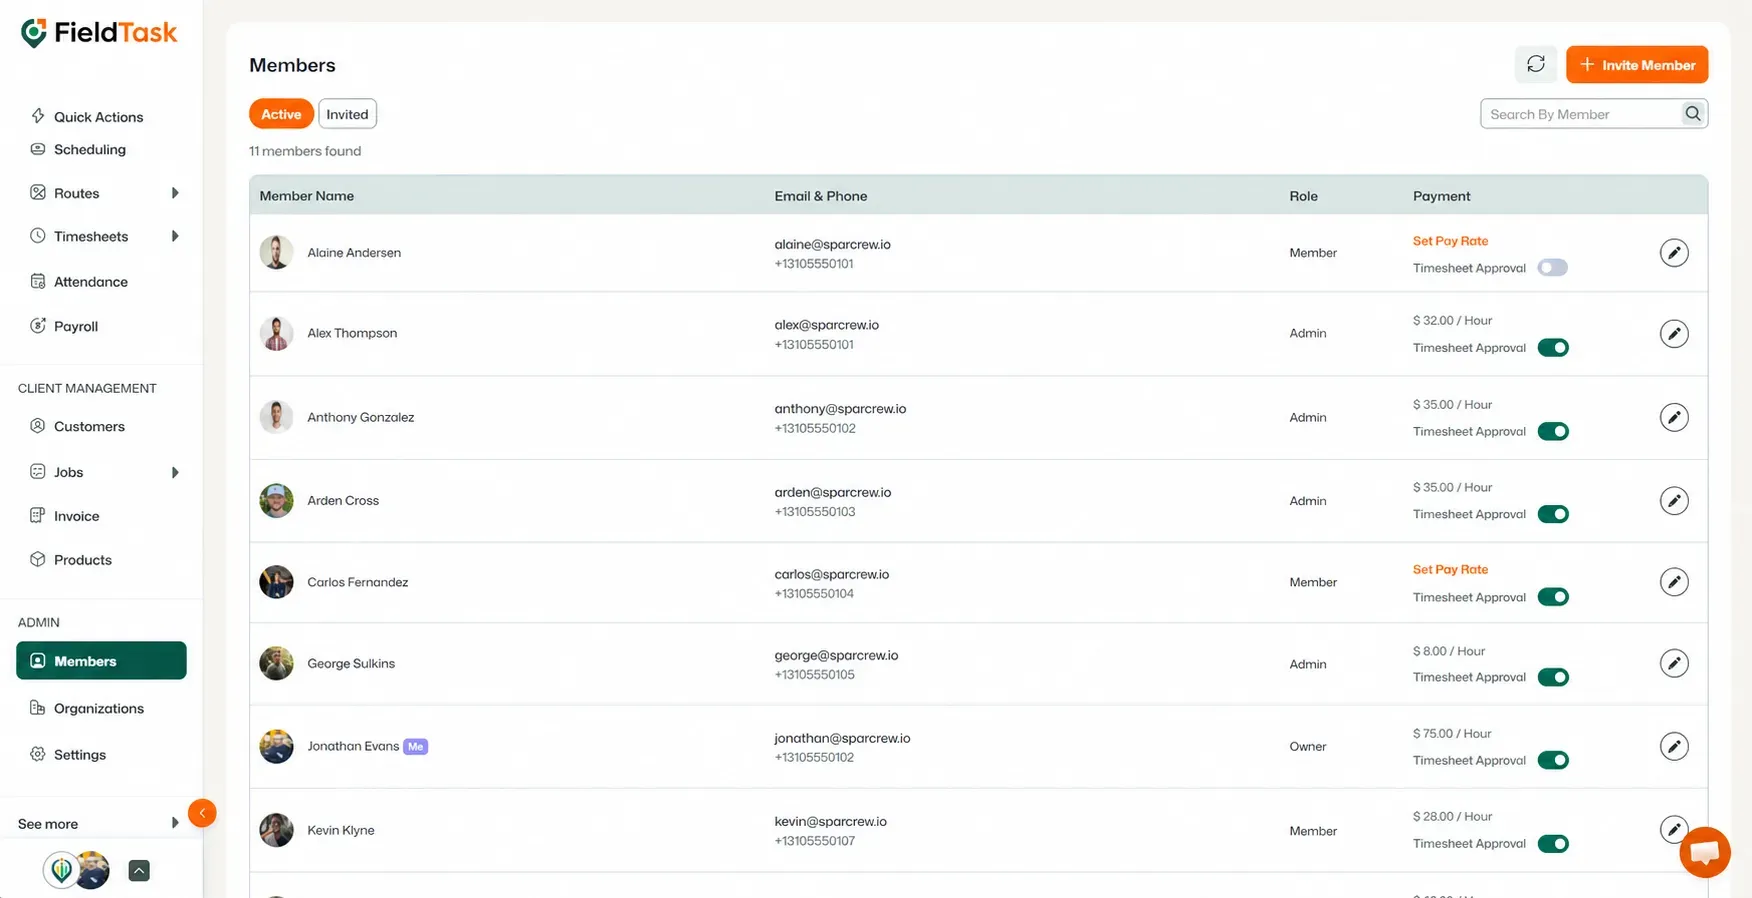
Timesheets will now be enabled for the selected Member.
You can also manage Timesheet access from Settings.
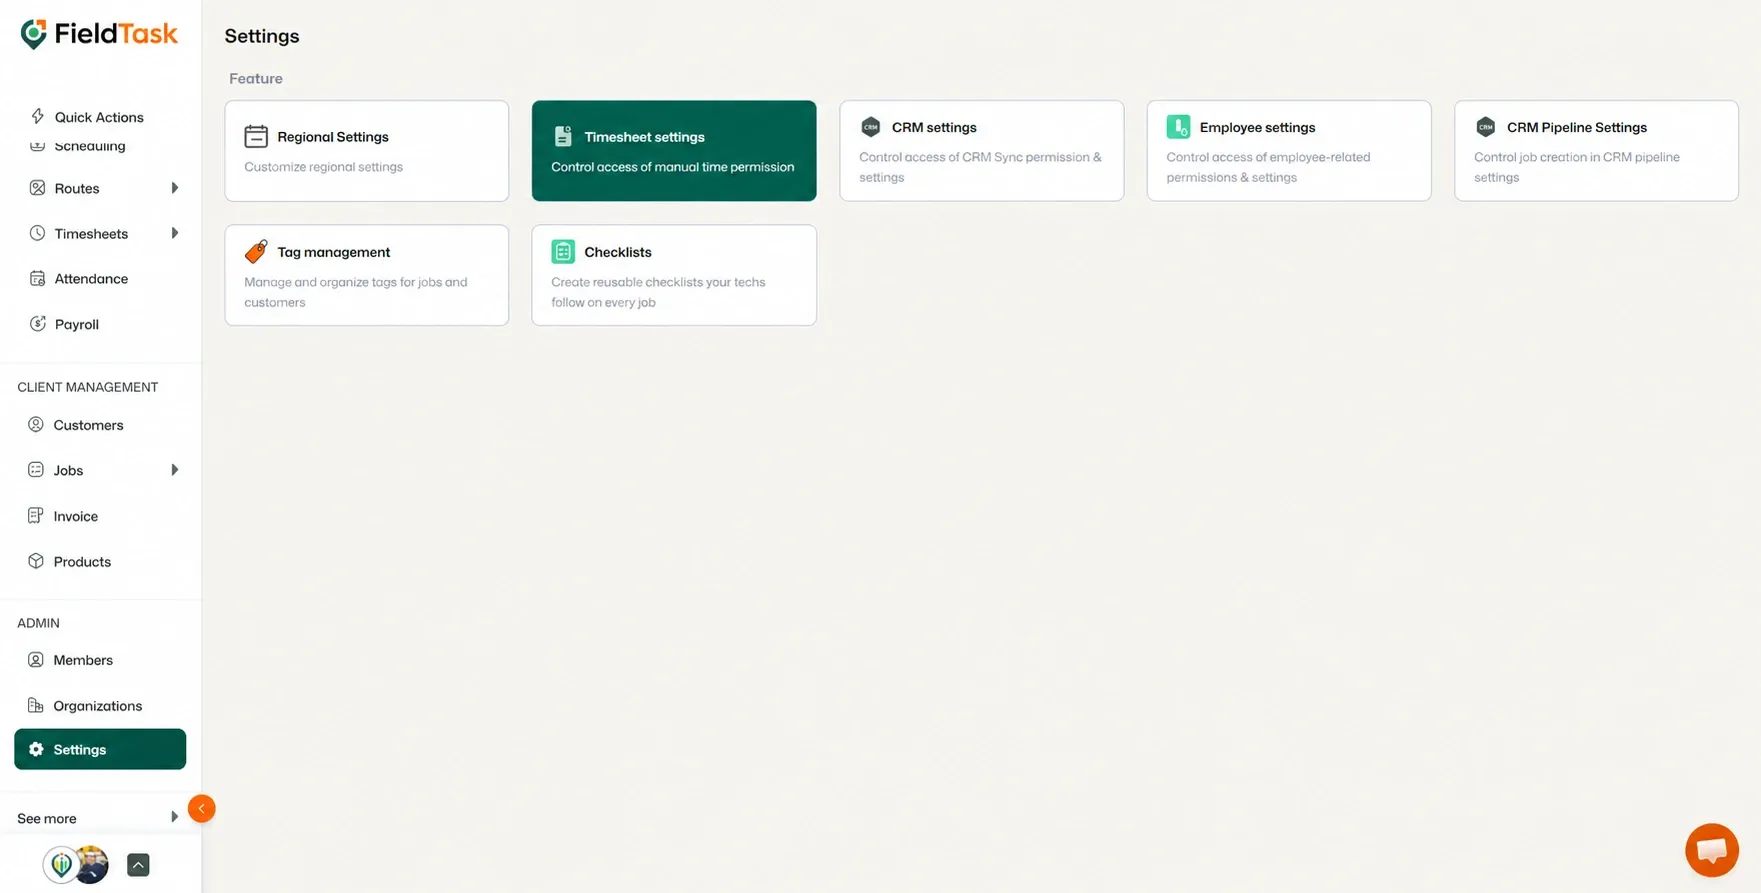
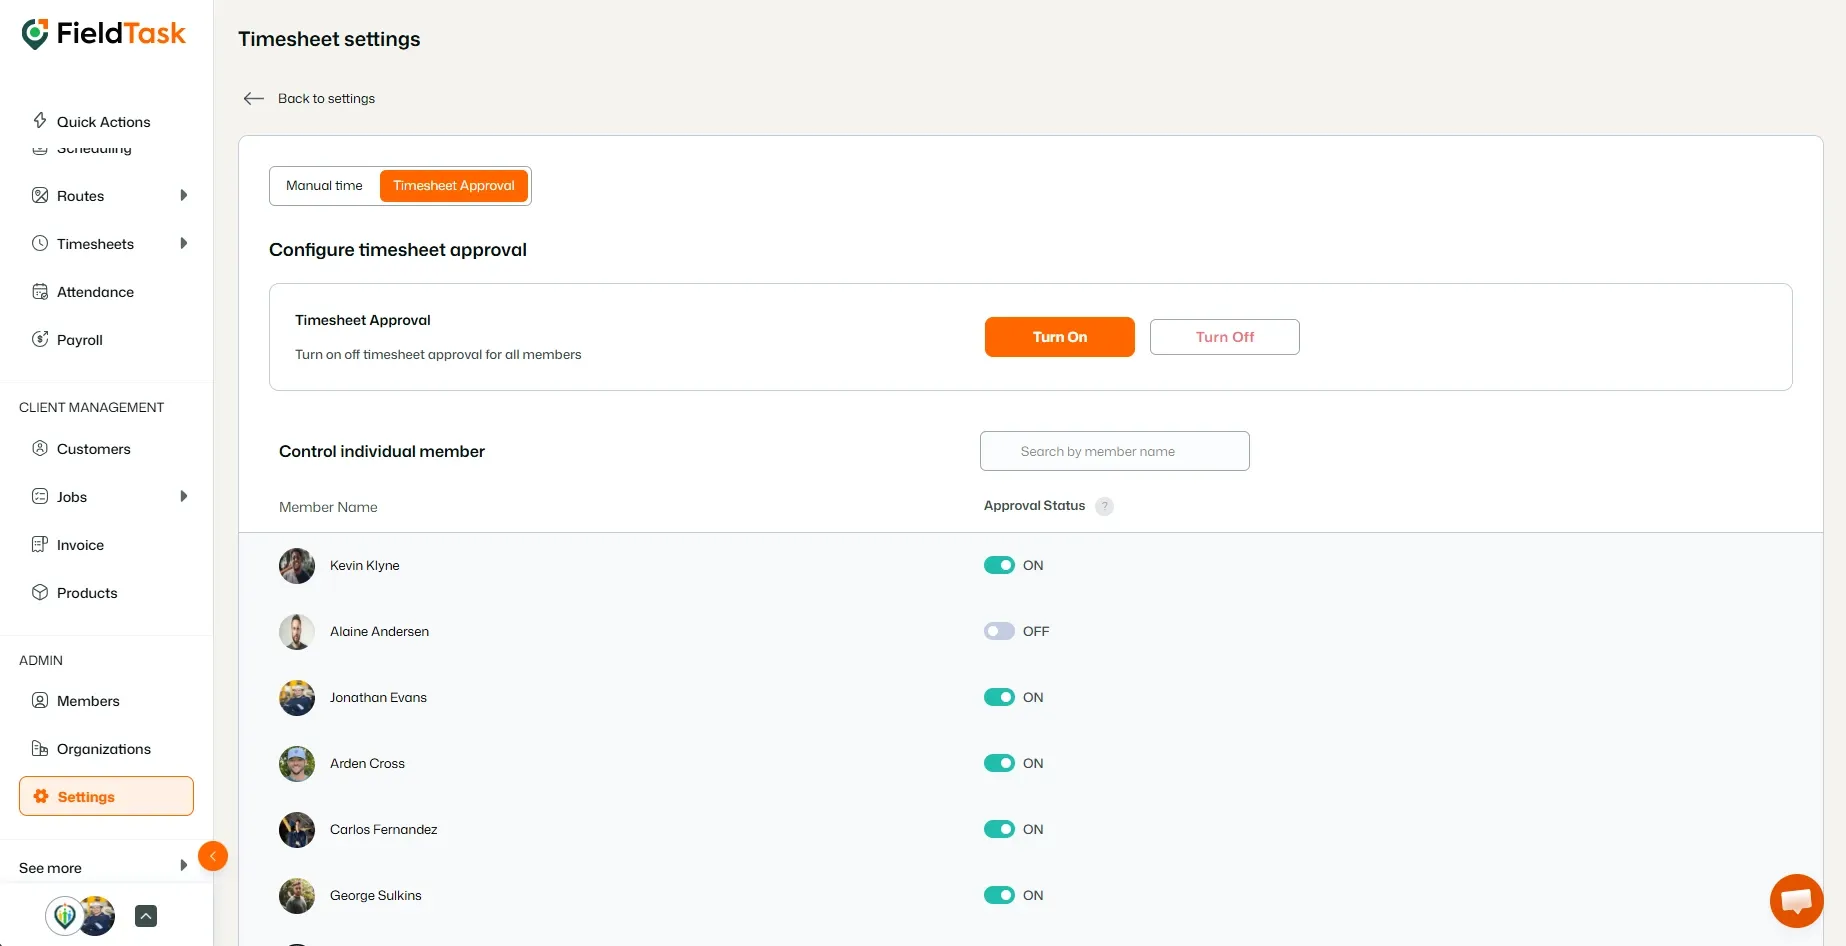
From this page, you can choose how you want to enable Timesheets:
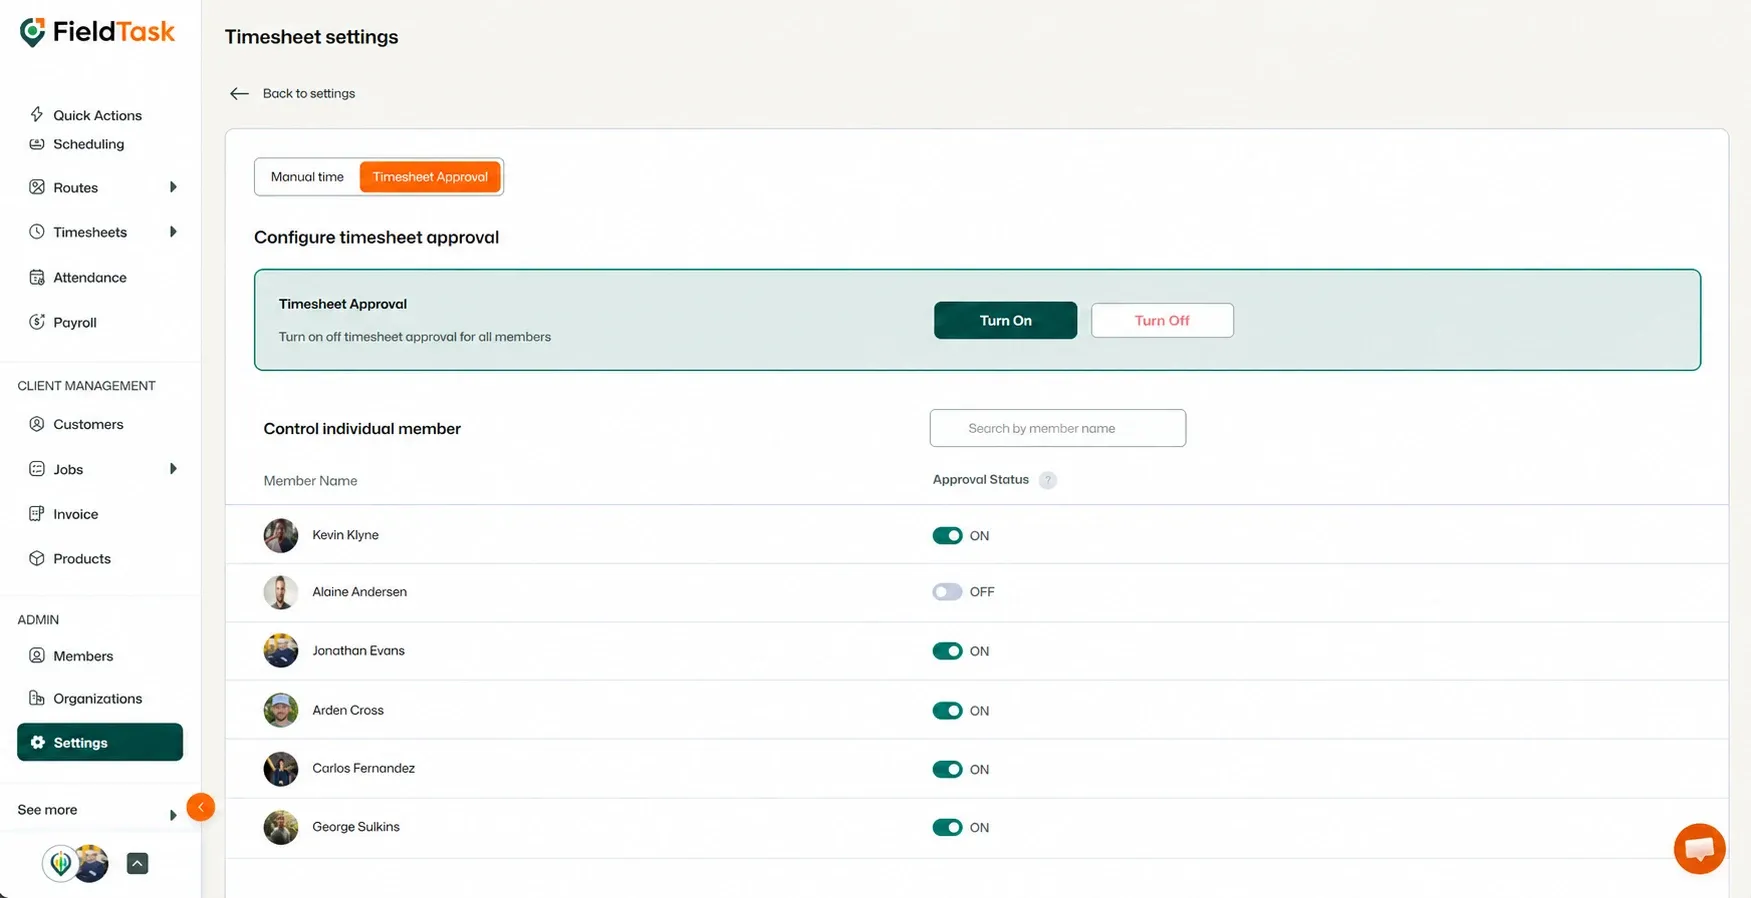
This gives you control over which Members can use Timesheets within your Organization.
Manage dispatch, route plan, techs, quotes, invoices, and more in GHL, the only dedicated field service app for HighLevel home service businesses and contractors.
The complete FieldTask sitemap: quick links to all pages.
Learn how FieldTask supports HIPAA compliance for home health and field service teams—encryption, BAAs, access controls, and audit logging.